Your Domain & Email
Use your own domain name, set up your email sender, and add a BIMI logo.
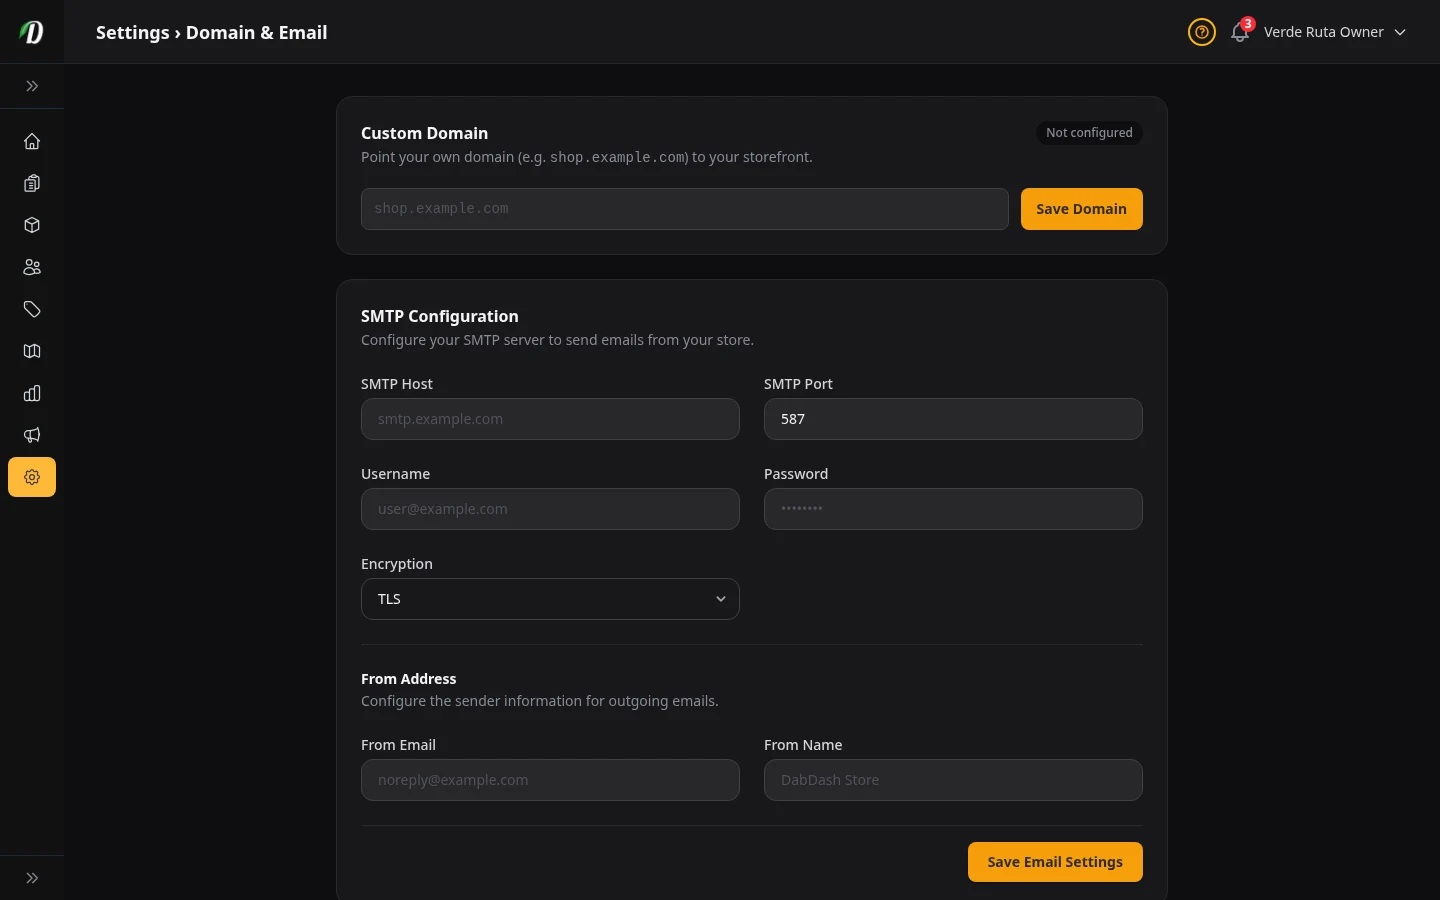
What this page does
Two big things live here. First, you can point your own domain name at your store (like shop.yourbrand.com instead of yourname.dabdash.com). Second, you can make emails come from your own email address instead of a shared DabDash address.
Type a domain you own (like shop.yourbrand.com) and save. Then add the DNS records shown at your domain provider and click Verify DNS. You can also configure the email logo, sending address, and the mailbox that feeds Inbox.
Custom Domain
By default your store is at yourname.dabdash.com. But you can use your own domain instead.
How to set it up
- Type your domain (like
shop.yourbrand.com) into the box and click Save Domain. - You will see two records to add at the place where you bought your domain (GoDaddy, Namecheap, Cloudflare, etc.).
- Add both records there. It can take a few minutes to a few hours for them to work.
- Come back here and click Verify DNS. When it passes, the badge turns green and says Active.
The two records
- TXT record
- This proves the domain is yours. Copy the name and value exactly as shown and add them at your domain provider.
- A record
- This sends visitors from your domain to your DabDash store. The value is always
93.95.229.147.
Removing a domain
Click Remove next to the domain field. Your store goes back to yourname.dabdash.com right away. You can delete the DNS records from your domain provider after that.
Upload a square SVG logo so some mail apps show your brand beside messages. After upload, add the TXT record your provider asks for.
Email Logo (BIMI)
BIMI lets you show your logo next to your name in Gmail, Apple Mail, and Yahoo Mail. This section only appears after you save a custom domain.
How to use it: Upload your logo as an SVG file, then add the DNS record shown on screen at your domain provider. Apple Mail and Yahoo start showing the logo right away. Gmail needs an extra certificate (VMC) — only worth doing if most of your customers use Gmail.
Send Email (recommended)
This is the easiest way to send order mail and campaigns (including leads). Look for the Send Email block on Domain & Email.
Easiest path (about 5 minutes)
- Connect Cloudflare (if you have not) under Settings → Integrations.
- Paste your Mailgun private key.
- Click Set up sending — we create five sending names and finish the hard parts.
- Send a test.
You can add a sending name yourself and paste DNS if you prefer. Most stores do not need that when Cloudflare is connected.
Fill in Host, Port, Username, and Password from your email provider so order emails leave from your address. Click Test connection after you save.
Advanced: other email provider
Only if you do not use Mailgun. Open Advanced: other email provider and paste host, port, username, and password so order emails come from your own address.
What to fill in
- SMTP Host
- Your email provider's outgoing server. Examples:
smtp.gmail.com,smtp.sendgrid.net. - SMTP Port
- Usually 587. Some providers use 465.
- Username & Password
- The login your email provider gave you. For Gmail, use an App Password (not your regular Gmail password).
- Encryption
- Almost always TLS. Pick SSL only if your provider says to.
From Address
- From Email
- The email address customers see in their inbox. Example:
orders@yourbrand.com. - From Name
- The name next to the email. Example: "Green Leaf Dispensary."
Testing it
After you save, a Send Test Email box appears. Type in any email address and click the button. If you get the test email, everything is working.
Going back to the default
Click Remove Settings at the bottom. All the SMTP fields clear out and emails go back to the shared DabDash sender.
Inbound Email (IMAP/POP3)
Connect your own mailbox so emails customers send you land right in your Inbox, alongside live chat — you reply from one place instead of switching to a separate email app. SMTP (above) is how your store sends email; this section is how it receives it.
- Label
- A name for this mailbox so you can tell it apart — e.g. "Support inbox".
- Protocol
- Choose IMAP (recommended — keeps messages on the server and in sync) or POP3.
- Server & Port
- Your mail provider's incoming server and port — for example
imap.gmail.com. Your provider lists these in their IMAP/POP setup help. - Username & Password
- The mailbox login. Many providers (Gmail, Outlook) require an app password rather than your normal one — generate it in your provider's security settings. Leave the password blank when editing to keep the current one.
- Encryption
- SSL/TLS or STARTTLS, depending on the port your provider uses. SSL/TLS on the secure port is the common choice.
Testing it
Click Test connection before saving. DabDash signs in to confirm the details work. Once connected, new customer emails start appearing in your Inbox automatically.
Tip: Use a dedicated support address (like support@yourstore.com) rather than a personal mailbox, so customer conversations stay organized in one place.
Frequently Asked Questions
How do I connect a custom domain to my DabDash store?
Go to Settings → Domain & Email, enter your custom domain (e.g., shop.yourbrand.com), and add the A record (pointing to 93.95.229.147) and TXT DNS records shown to your domain registrar. Click Verify DNS — once propagated (usually under 24 hours), your store goes live on your domain.
How do I set up a custom email sender in DabDash?
In Settings → Domain & Email, enter your SMTP server details (host, port, username, password), set a From address and name, and use the test panel to send a test email. Once confirmed, all customer emails (order confirmations, notifications) come from your own address.
Does DabDash support custom domains at no extra cost?
Yes — every DabDash store gets a free subdomain (yourstore.dabdash.com) and you can also connect your own custom domain at no extra cost. Custom domains improve brand recognition and have a positive impact on local SEO rankings.