Integrations
Connect Google Analytics, Search Console, and Cloudflare to your store.
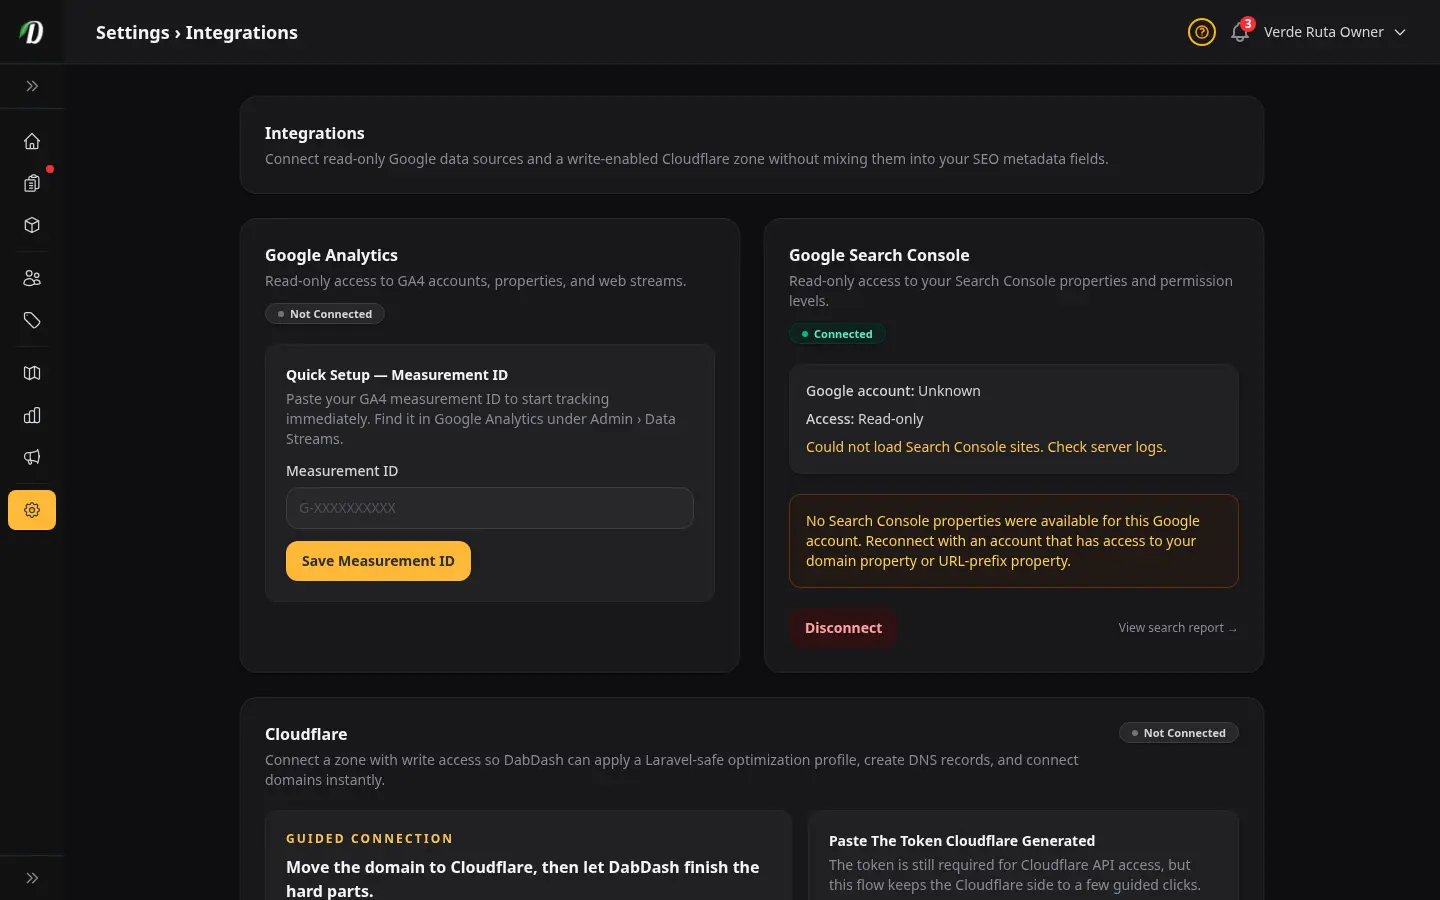
Overview
The Integrations page lets you connect external services to your DabDash store. Each integration is managed independently — connect one, some, or all of them.
Navigate to Settings → Integrations in your admin sidebar to get started.
Google Analytics
Track visitor behaviour on your storefront with Google Analytics 4. DabDash uses a simple Measurement ID approach — no OAuth sign-in required.
- Open Google Analytics and go to Admin → Data Streams.
- Copy your Measurement ID — it starts with G- followed by letters and numbers.
- Paste the ID into the Measurement ID field on the Integrations page and click Save Measurement ID.
Once saved, the status badge changes to Tracking and the GA4 script loads automatically on every storefront page.
Google Search Console
Connect Search Console to see how your store performs in Google search results. This uses read-only OAuth access — DabDash never changes anything in your Search Console account.
- Click Connect Search Console and sign in with your Google account.
- If you have multiple properties, choose the one that matches your store domain from the dropdown.
- Click Save Search Console Property.
To switch accounts or remove access, click Disconnect at the bottom of the Search Console card.
Cloudflare
Connecting Cloudflare lets DabDash automatically configure HTTPS, compression, DNS records, and custom domain verification. This is the fastest way to go live with your own domain.
Connecting for the first time
- Make sure your domain's nameservers point to Cloudflare and the zone is active.
- Click Open Cloudflare — this opens a pre-filled API token template with the exact permissions DabDash needs.
- Create the token in Cloudflare and copy it.
- Paste the token into the Cloudflare Access Token field and click Validate Cloudflare Access.
- Pick your zone from the dropdown, tick the optimization checkbox, and click Connect And Optimize Cloudflare.
Instant Domain Connection
After connecting Cloudflare, use the Instant Domain Connection form to enter your custom domain. DabDash creates the required DNS and TXT records in Cloudflare, sets the custom domain on your tenant, and marks it verified immediately — no waiting for DNS propagation.
Zone Maintenance
DabDash periodically checks whether your Cloudflare zone still matches the managed profile. If someone changes settings in Cloudflare directly, the status badge changes to Needs Sync. Click Re-Sync Optimal Settings to bring it back in line.
Tips
- You can connect integrations one at a time — they are independent.
- Disconnecting an integration does not delete data in the external service.
- The Cloudflare connection gives DabDash write access to your zone. Only connect zones you want DabDash to manage.
- If the Google Analytics status shows "Not Connected" after saving, double-check that the ID starts with G-.
Frequently Asked Questions
How do I connect Google Analytics to my DabDash store?
Go to Settings → Integrations and paste your GA4 Measurement ID (starts with G-) into the Google Analytics field. Click Save Measurement ID. The GA4 tracking script loads automatically on every storefront page.
How do I connect Google Search Console to DabDash?
On the Integrations page, click Connect Search Console and sign in with your Google account. Choose the Search Console property that matches your store domain from the dropdown and click Save. DabDash uses read-only access — nothing in Search Console is changed.
How do I connect Cloudflare to DabDash?
Click Open Cloudflare on the Integrations page — a pre-filled API token template opens. Create the token, paste it into DabDash, validate it, then pick your zone and approve the optimization profile. DabDash configures HTTPS, compression, DNS, and custom domain verification automatically.
Can I disconnect an integration from DabDash?
Yes. Each integration card has a Disconnect button. Disconnecting removes DabDash access but does not delete data in the external service. You can reconnect at any time.