Dispatch & Routes
Approve shift cancellations and swaps, confirm driver assignments, and review every driver's route on a map.
Overview
Dispatch is where you sign off on the day's deliveries. It pulls together everything that needs your decision into one screen, so you are not chasing messages or guessing who is covering what. There are two halves: the Dispatch page, where you handle requests and confirm who delivers each batch of orders; and the Driver Routes page, where you see those deliveries laid out on a map.
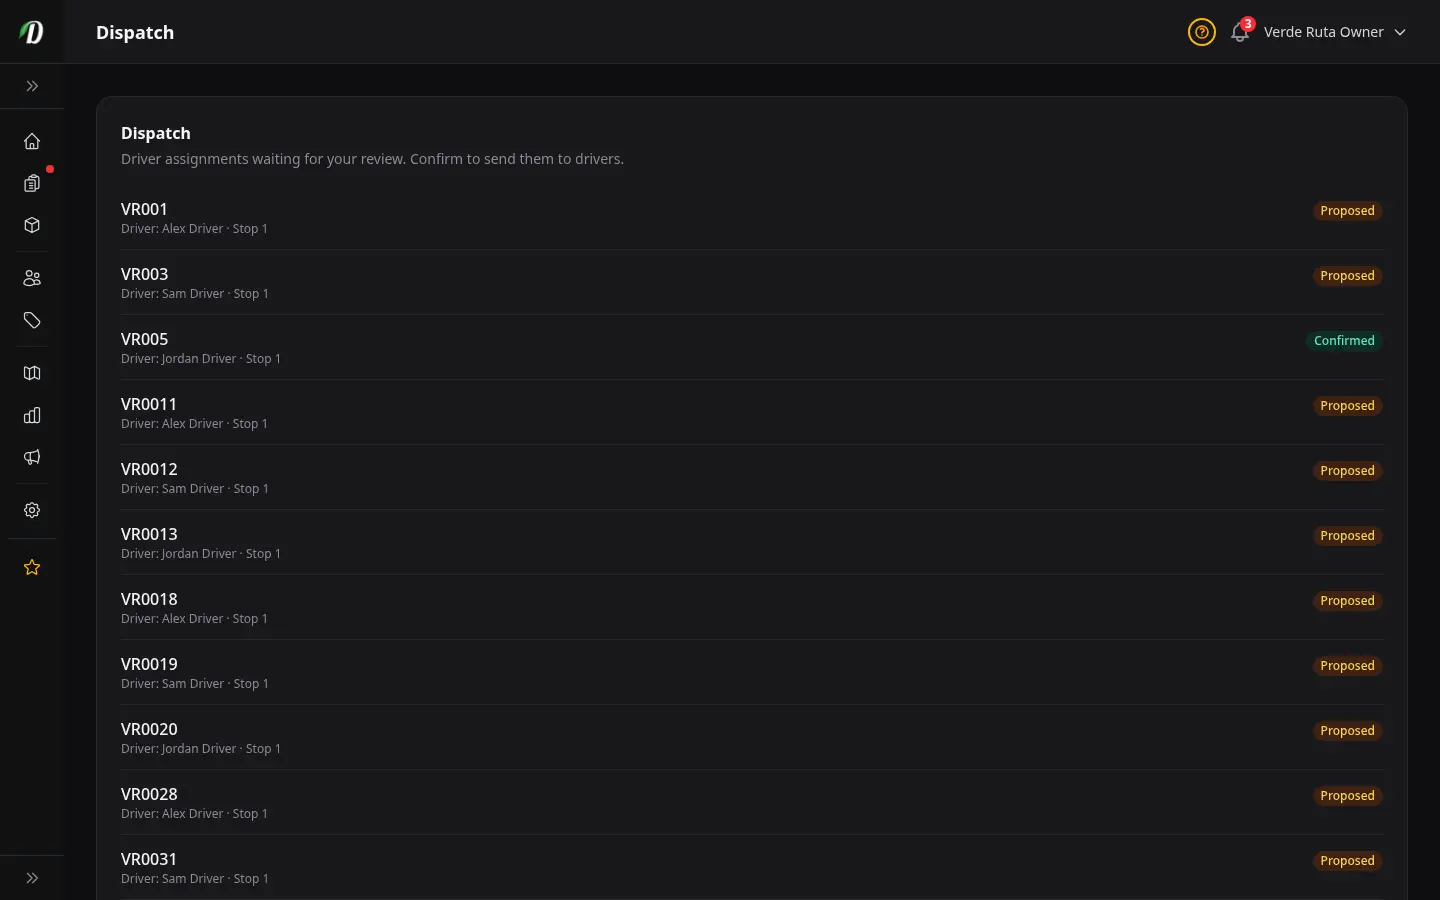
The Dispatch page is organised as three review lists, top to bottom: cancellation requests, swap requests, and proposed assignments per delivery slot. Work through them in order and your schedule for the day is locked in. Anything that does not need a decision simply does not appear, so an empty list means there is nothing to do.
Approving Cancellations & Swaps
The first two lists are about changes to who is working. Both need your final say.
- Cancellation requests
- A driver who can no longer make a shift asks to be let off it. When you approve, the driver comes off the shift and that time is freed up — it becomes available for another driver to claim or for you to fill. When you deny, the request is turned down and the driver stays on the shift as scheduled. Approve when you can cover the gap; deny when you still need that driver on the road.
- Swap requests
- Two drivers have already agreed between themselves to trade shifts — you are giving the final sign-off, not setting the swap up. The request shows you who is handing off and who is picking up. Approve it and the two shifts switch hands. Because the drivers have already arranged it, your job is just a quick check that the swap works for your coverage before you confirm.
Handling these first matters, because approving a cancellation or swap changes who is available — and that feeds directly into the assignment suggestions in the next list.
Confirming Assignments
The third list is the heart of dispatch. For each delivery slot, you are shown a proposed assignment: a suggested driver and a suggested stop order — the sequence the deliveries should be made in to keep the route efficient. This is a starting point built for you, not a final decision.
For each slot you have two choices:
- Confirm the slot
- If the suggested driver and stop order look right, confirm the slot. This is the action that sends the stops to your drivers — until you confirm, nothing has been handed off and the driver does not yet have their list of deliveries. Confirming is what turns the plan into the actual route they follow.
- Reassign first
- If the suggested driver is not the right fit — they are stretched thin, or another driver is better placed for that area — reassign the slot to a different driver before confirming. Make the change, check the stops still make sense, then confirm to send them out.
Confirm each slot once you are happy with it. A slot you have not confirmed stays in the list as a reminder that those deliveries have not been dispatched yet.
The Routes Map
The Driver Routes page turns your confirmed assignments into a picture. Pick a date and a delivery slot at the top, and the map fills in with every stop for that window, drawn out from your store.
It gives you two views of the same deliveries, side by side:
- The map — every delivery stop is plotted and colour-coded by driver, so you can instantly see which driver is covering which part of the area. Routes radiate out from your store, so a tight cluster of one colour is an efficient run and a scattered one may need rebalancing.
- The per-driver stops table — a list of every driver's stops in order, alongside the map. This is the detail behind the dots: the addresses, the sequence, and which driver owns each one.
Click a row in the table to highlight that route on the map. This is the quickest way to follow a single driver's path end to end — useful when a customer calls asking where their order is, or when you want to sanity-check that a driver's run is not zig-zagging across town. Switching the date or slot at the top reloads the map for that window.
The Command Center & Dispatch Mode
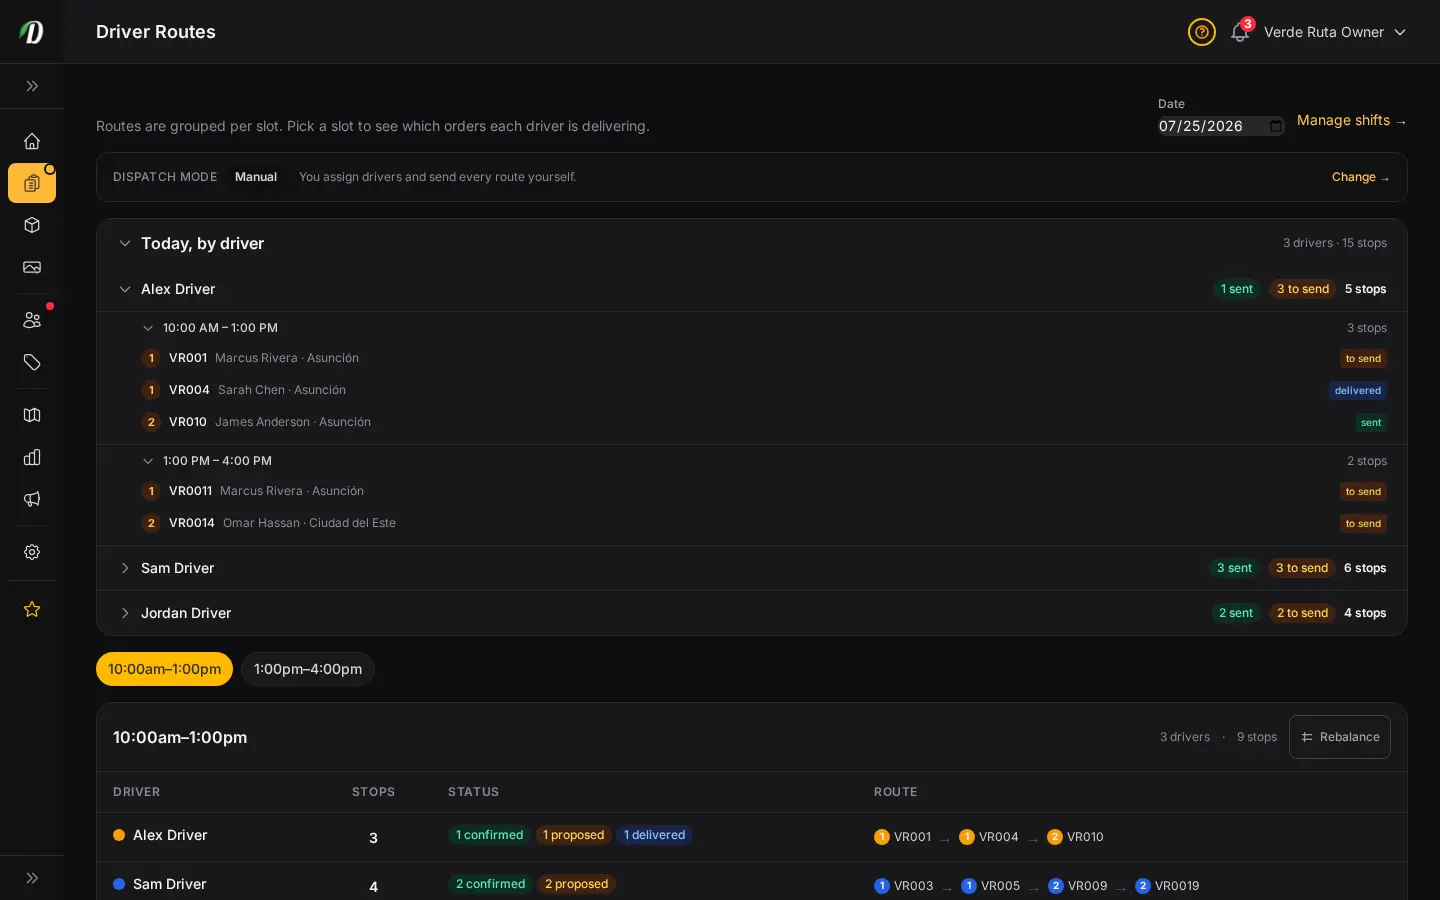
At the top of the page, the Dispatch mode indicator shows how hands-on you have chosen to be. It is one clear setting with three options:
- Manual — you assign drivers and send every route yourself.
- Hybrid — DabDash drafts the routes for you, and you review and send them.
- Automatic — DabDash drafts and sends routes for you, hands-off.
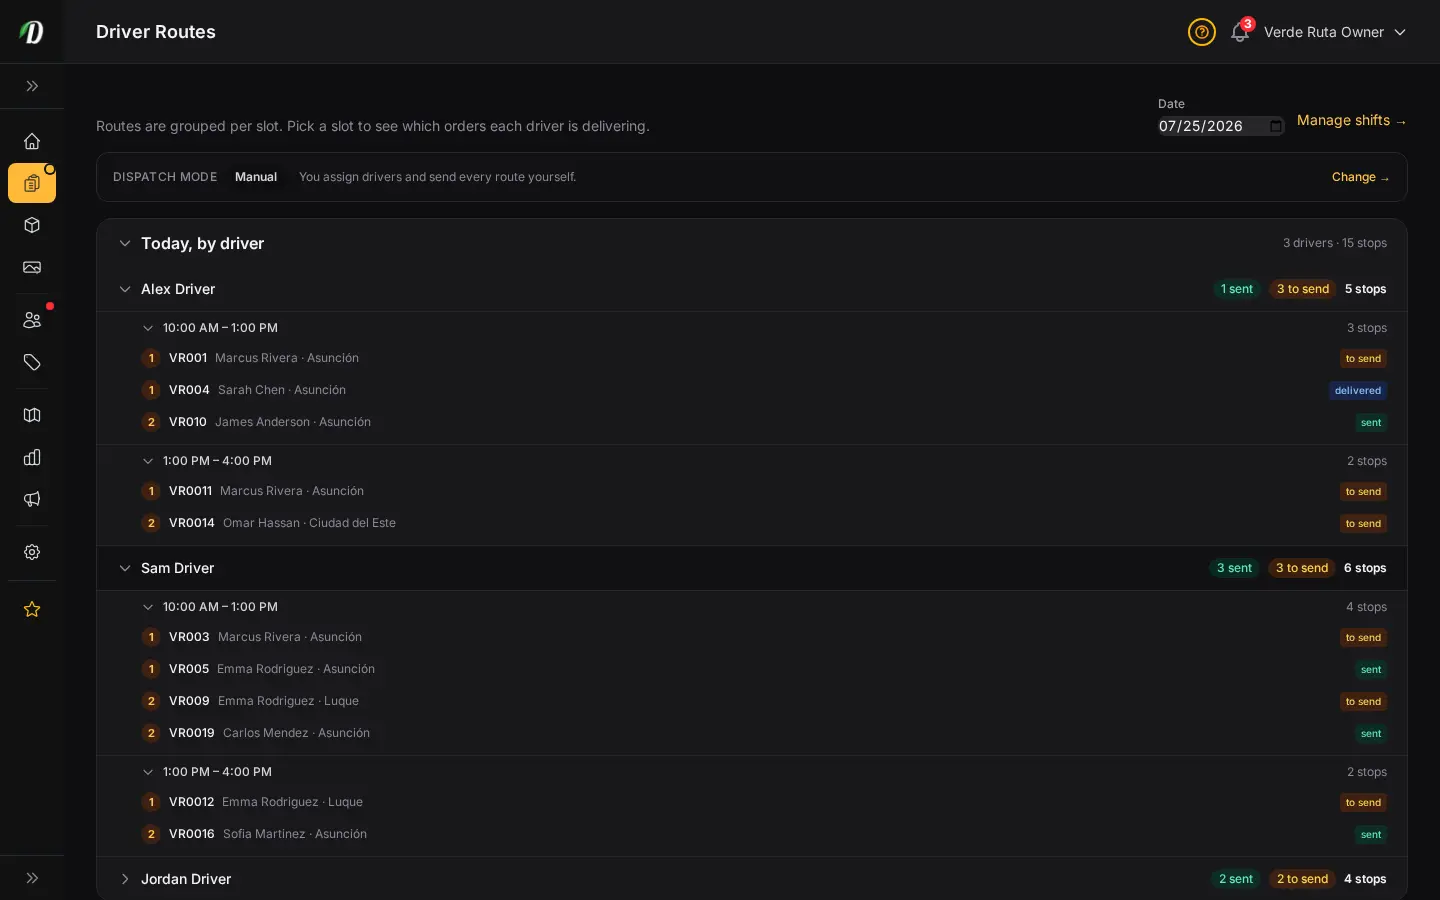
You change the mode from Delivery settings — the indicator links straight there. Below it, the Today, by driver rollup answers the one question that matters at a glance: what is each driver doing today? It groups the day by driver → time window → ordered stop, in the exact order each driver will drive it, with a "to send" or "sent" badge on every stop. The same rollup appears on your dashboard so you can check delivery is handled without leaving the home screen.
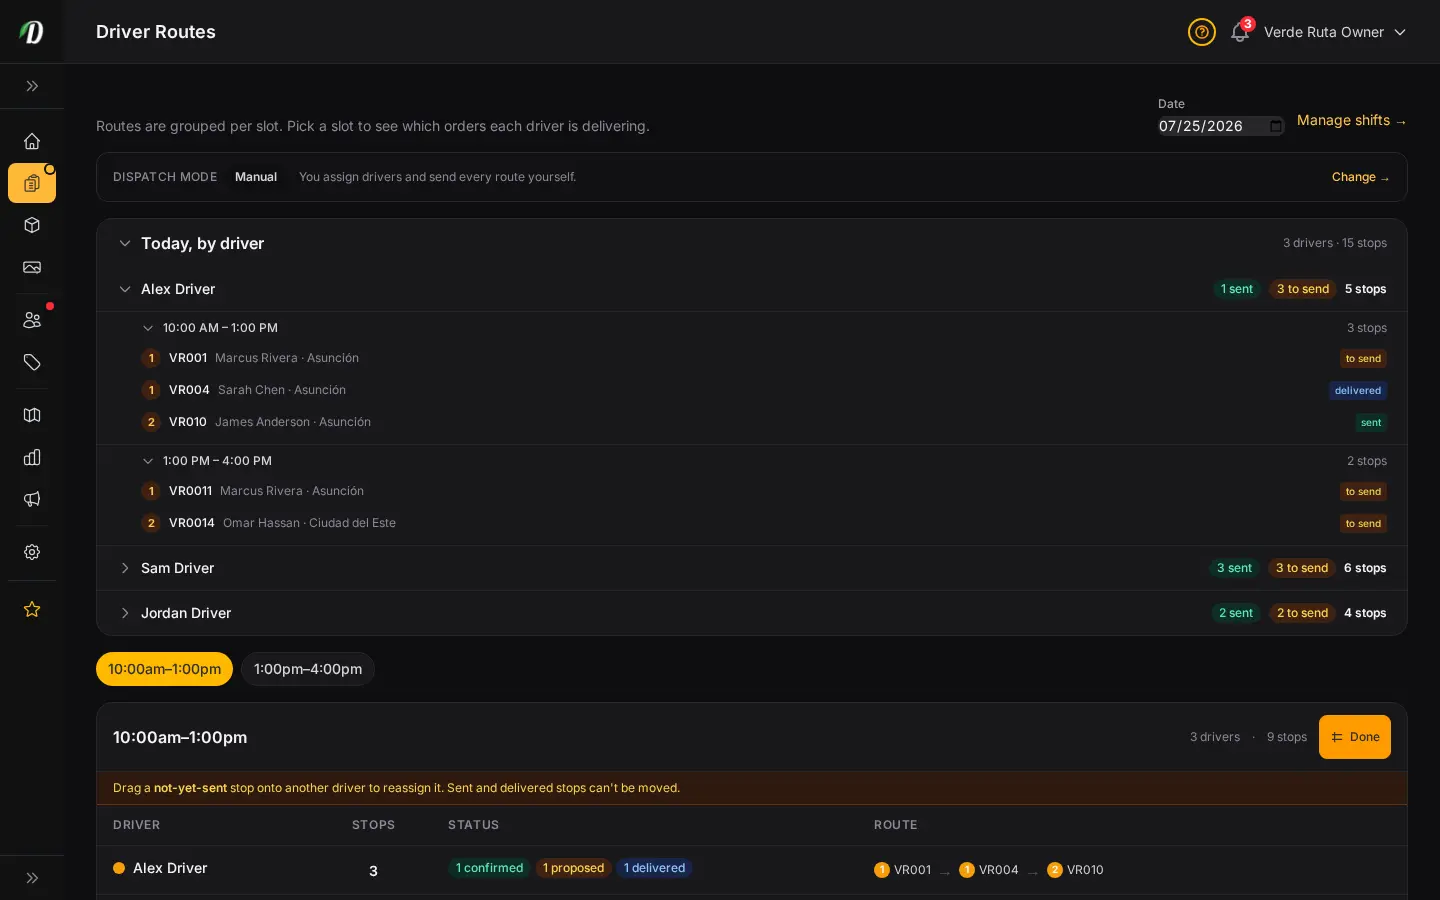
Rebalancing with Map Mode
When one driver is overloaded and another has room, you do not need to undo anything — click Rebalance in the driver table header to turn on Map Mode. The not-yet-sent stops become draggable chips.
Drag a stop from one driver and drop it onto another driver's row. DabDash reassigns it instantly and appends it as that driver's last stop, so their run stays in order. Only stops you have not sent yet can move — once a stop is sent to a driver, it is locked. If the target driver's shift does not cover the order's zone, DabDash blocks the move and tells you why, so you never hand a stop to someone who cannot deliver it. Click Done to leave Map Mode.
Tips
- Work the Dispatch lists top to bottom. Settle cancellations and swaps first, because they change who is available before you confirm assignments.
- Remember that confirming a slot is what actually sends the stops to your drivers. A plan you have reviewed but not confirmed has not gone anywhere yet.
- Reassign before you confirm, never after. It is far simpler to fix the driver while the slot is still in the list than to undo a dispatched route.
- Use the routes map to catch inefficient runs early — a scattered spread of one colour usually means the stops would be quicker split differently between drivers.
- Click a stop row to highlight that driver's whole route when a customer asks for an update. It is the fastest way to see exactly where their delivery sits in the run.
- Check the map for the right date and slot. Each window has its own deliveries, so make sure the selector at the top matches the run you are reviewing.
Frequently Asked Questions
How do I approve a driver's cancellation or swap in DabDash?
Open the Dispatch page. Cancellation requests and swap requests each have their own section. Approve a cancellation to free the shift, or approve a swap (after both drivers agreed) to lock in the trade. You can also deny either one.
How do I confirm driver assignments for a delivery slot?
The Dispatch page lists proposed driver assignments for each slot. Review the suggested driver and stop order, then confirm the slot to send the stops to your drivers. You can reassign before confirming if you want a different split.
How do I see all my drivers' routes on a map?
Open the Driver Routes page, pick a date and a delivery slot, and you'll see every stop on a map colour-coded by driver, starting from your store, alongside a per-driver stops table. Click a row to highlight that driver's route.