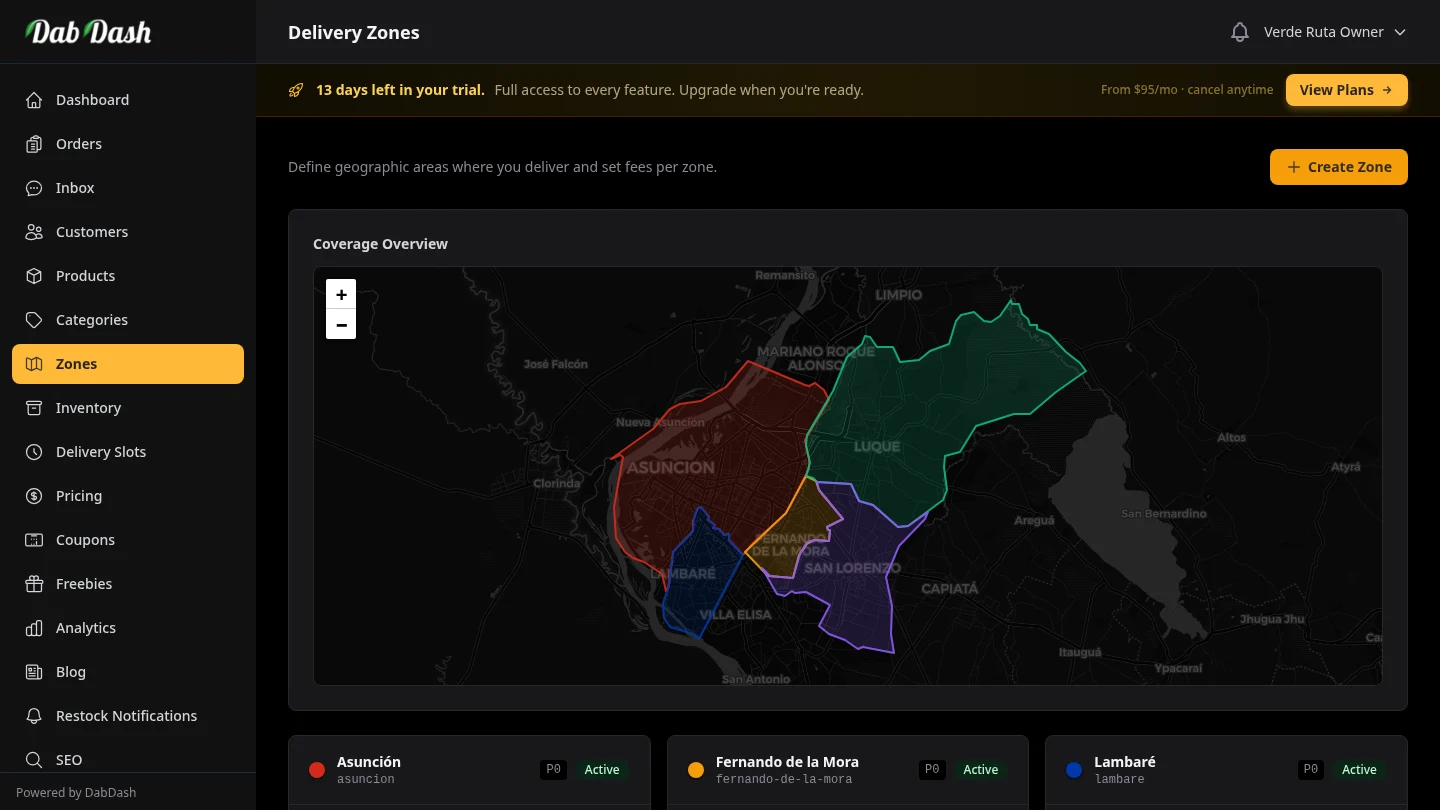
Delivery Zones
Draw or import delivery zones, search by customer, verify address coverage, and control where you deliver.
Overview
Delivery zones define the geographic areas where your store delivers. Each zone is drawn as a boundary on the map and carries its own delivery fee, service fee, minimum order amount, and priority. Customers are automatically matched to the correct zone based on their delivery address when they check out.
The page also helps you decide where those boundaries should go. You can search for customers to highlight their saved addresses, use the address coverage checker to test individual locations, and review the "No Zone" overlay to spot demand that is currently outside your map.
You need at least one active zone before customers can place orders. If a customer's address does not fall inside any active zone, they will not be able to complete checkout.
Quick Start Options
There are two ways to get coverage live:
- Create zones from scratch
- Use Create Zone to draw the boundary yourself and set the exact fees and minimum order values you want.
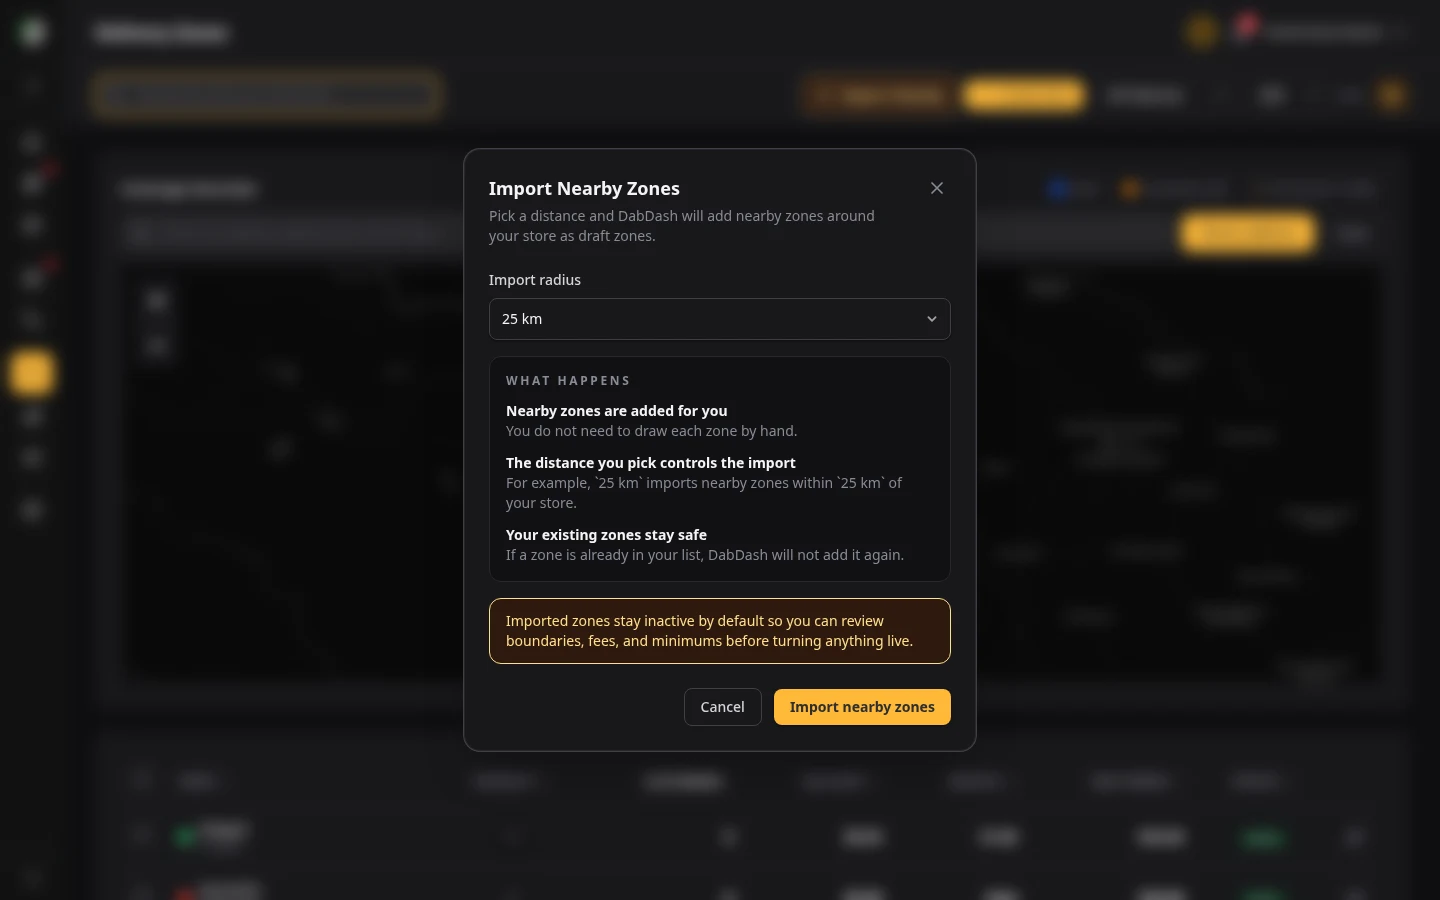
- Import nearby zones in one click
- Use Import Nearby to pull live region boundaries around your store using a 5 km, 15 km, 25 km, 50 km, or 100 km radius. Imported zones start inactive so you can review the boundaries and pricing before turning anything live.
Coverage Map
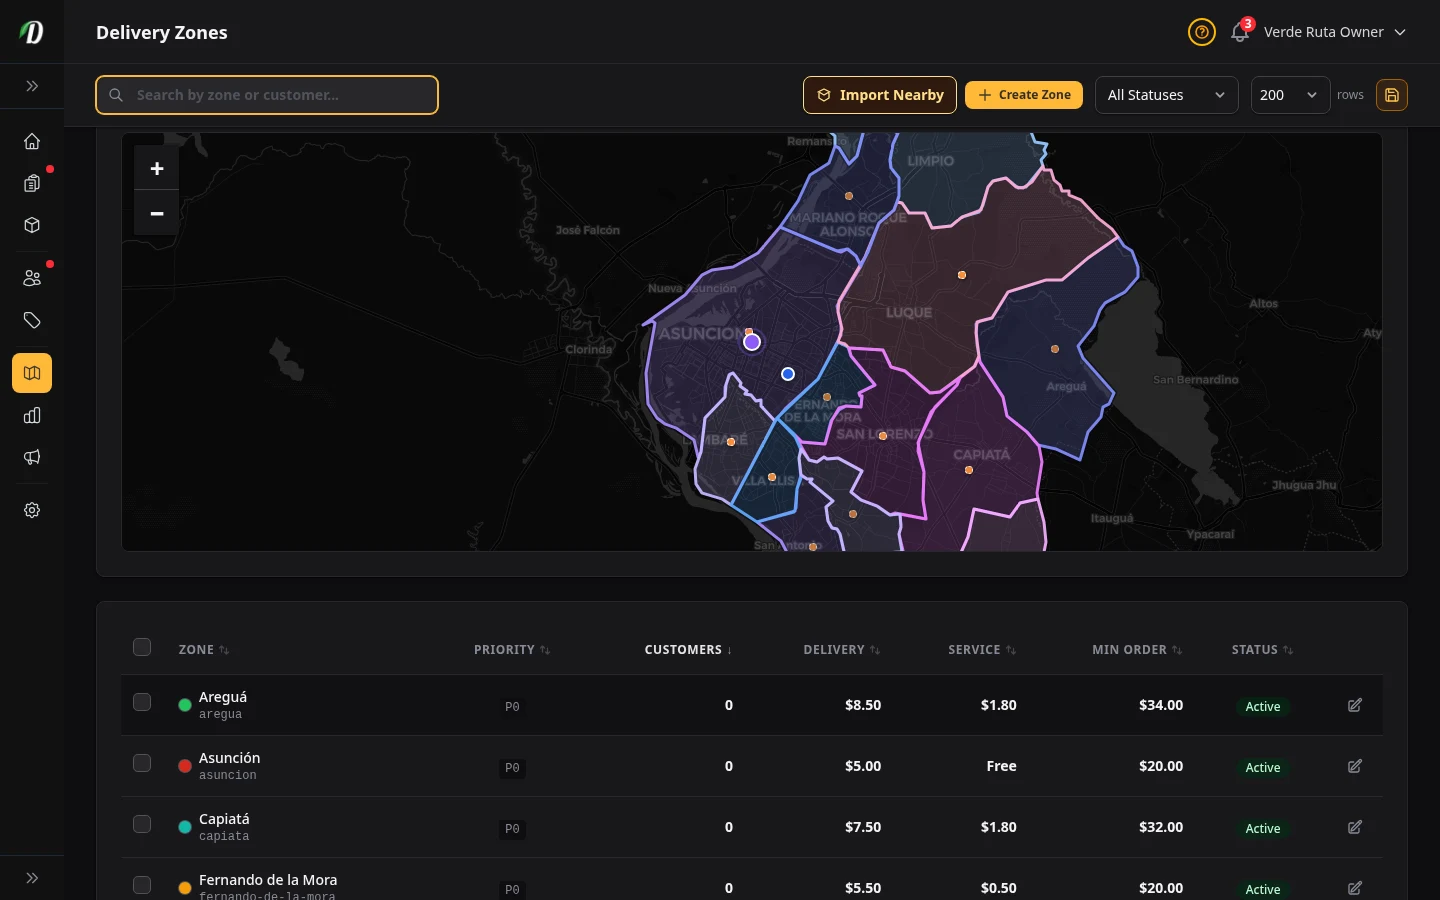
The map at the top of the page shows all your zones as coloured boundaries. Hover over any boundary to see its name and priority. Inactive zones appear more transparent than active ones. Customer points and the "No Zone" overlay help you compare your current map against real demand.
- Blue dot
- Your store location — set in Settings → General. Hover to see the address.
- Orange dots
- Customer delivery addresses for past orders. These help you see where your customers actually live so you can draw zones that match your real delivery area.
Search by Zone or Customer
The search bar above the page filters more than zones. Start typing a zone name to jump straight into editing, or select a customer to highlight their saved addresses on the map.
This is especially useful when support asks whether a specific customer is covered, or when you want to redraw boundaries around the areas your regular shoppers actually use.
Address Coverage Checker
Above the map there is also a Check address tool. Enter an address and DabDash will geocode it, drop a marker on the map, and list every matching zone with priority badges.
If there are no matches, the result tells you the address is currently outside all drawn delivery zones. That makes it easy to answer live-chat questions and decide whether to expand coverage.
Creating a Zone
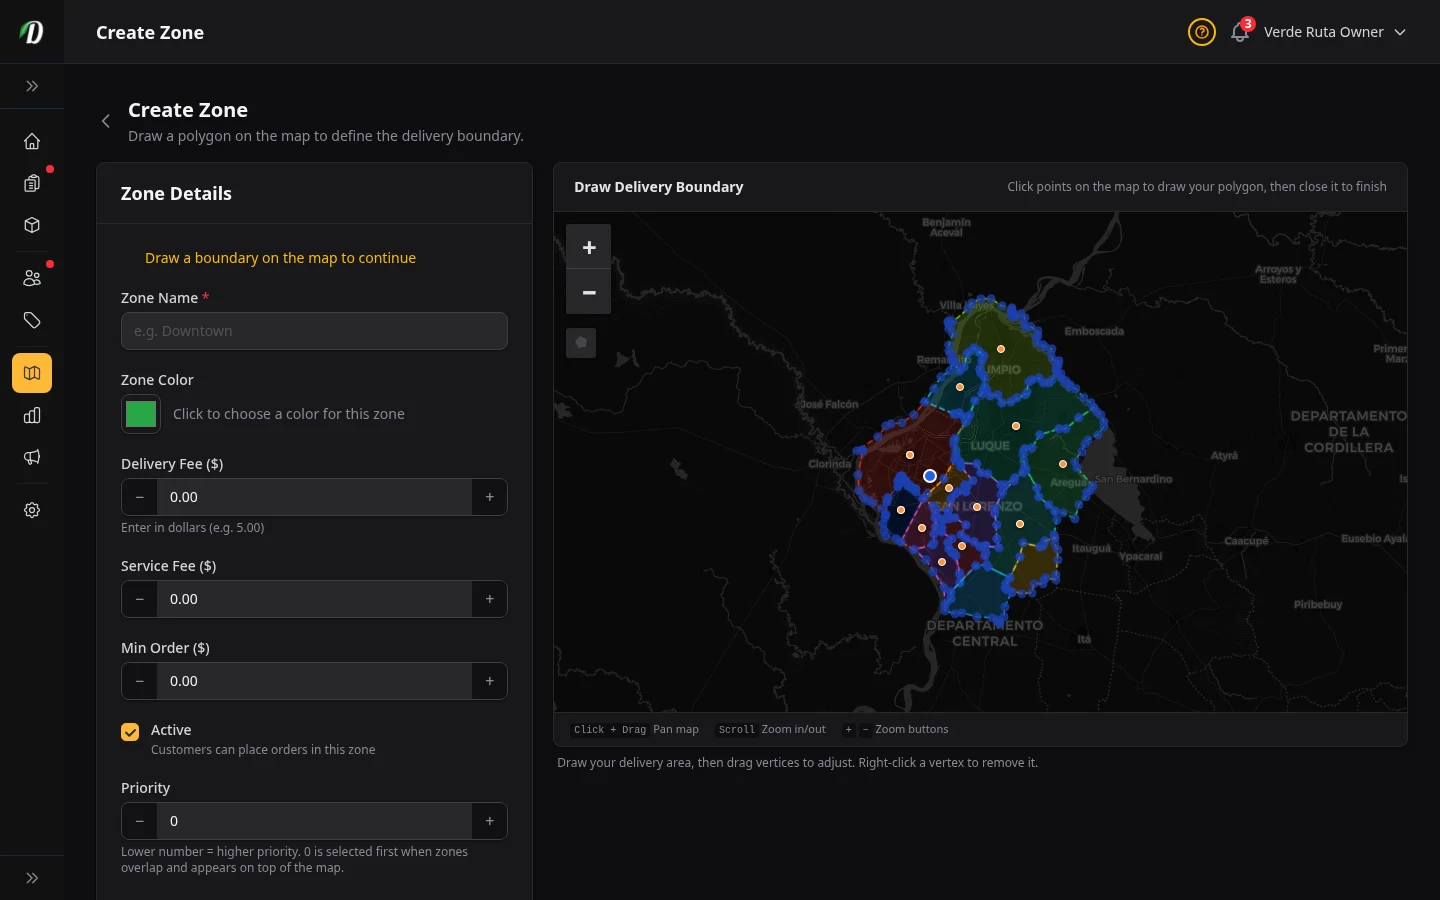
Click Create Zone to open the zone editor. You will be taken to a full-screen map where you can draw the boundary of your new zone. A polygon status indicator shows whether a boundary has been drawn or is still needed.
- 1
Zone Details
In the details panel, give the zone a Name customers will recognise at checkout (e.g., "Downtown" or "North Side"). Set the Priority number — if zones overlap, the zone with the higher priority wins for that address.
- 2
Zone Colour
Pick a colour for the boundary on the coverage map. When you have multiple zones, distinct colours make it easy to tell areas apart at a glance.
- 3
Active Switch
Switch Active on before saving so customers in this area can place orders immediately. Leave it off to create the zone without making it available — useful when you want to set up fees before launching.
- 4
Draw the Boundary
Click the Draw Tool (pentagon icon) in the top-left toolbar of the map. Click around the edge of the area you want to cover — add as many points as you need to trace the boundary accurately. Click the first point again or double-click to close the boundary. After drawing, drag any corner point to reshape the boundary, or right-click a corner point to remove it (minimum 3 points). To clear the boundary and start over, click the red trash button. Then set the Delivery Fee, Service Fee, and Minimum Order in the details panel and click Create Zone.
Tip: The orange dots on the map show delivery addresses from past orders. Use them as a guide when drawing zone boundaries so your coverage matches where your customers actually live.
Using the Map
The zone editor uses an interactive map. Here is every control and interaction available to you.
Navigation
- Pan (move the map)
- Click, hold, and drag anywhere on the map to move it around. On a touchscreen, use one finger to drag. The map does not move with a single click — you must hold and drag.
- Zoom in / out
- Use the + and − buttons in the top-left corner, scroll your mouse wheel, or pinch on a touchscreen. Double-click also zooms in.
Drawing & Editing Tools
The toolbar appears in the top-left of the map, below the zoom buttons. It changes depending on whether a boundary has been drawn.
- Draw Tool (pentagon icon)
- Shown when no boundary exists. Click to activate, then click on the map to place each corner point of your delivery area. Click the first point again or double-click to close the shape. While drawing, pan the map by dragging from an area away from your points.
- Corner point editing (drag & right-click)
- After drawing, the boundary enters edit mode automatically. Drag any corner point (the square handles at each corner) to reshape the boundary. Right-click a corner point to remove it — the boundary must keep at least 3 points. Changes sync to the form in real time.
- Clear boundary (red trash button)
- Shown when a boundary exists. Click to clear the entire boundary after a confirmation dialog. The Draw Tool reappears so you can start fresh. You can clear and redraw as many times as needed before saving.
Map Markers
- Blue dot — Your store
- Shows your store location as set in Settings → General. Hover to see the address. This helps you centre your zones around your base of operations.
- Orange dots — Customer addresses
- Delivery addresses from past orders. Hover any dot to see the customer name and address. Use these as a guide — draw your zone boundaries to cover the clusters where your customers actually live.
- Dashed outlines — Existing zones
- Other zones you have already created appear as dashed, semi-transparent boundaries. Hover to see the zone name. These help you avoid gaps or unintended overlap between zones.
- Blue corner points — Snap points
- Small blue dots at the corners of existing zones. These are visual guides that help you align new zone edges with existing ones for seamless coverage.
Tips & Troubleshooting
- "I can't move the map"
- The map requires a click + hold + drag to pan — a single click places a corner point when the Draw Tool is active. If you are in drawing mode, drag from an empty area of the map (away from your points) to move it.
- Boundary won't close
- You need at least 3 points. Click the very first point again, or double-click to finish. The cursor changes to a crosshair with a small green icon when you hover over the starting point.
- Dark / light map tiles
- The map automatically switches between light and dark tiles to match your dashboard theme. If you switch themes, the map updates instantly.
Editing a Zone
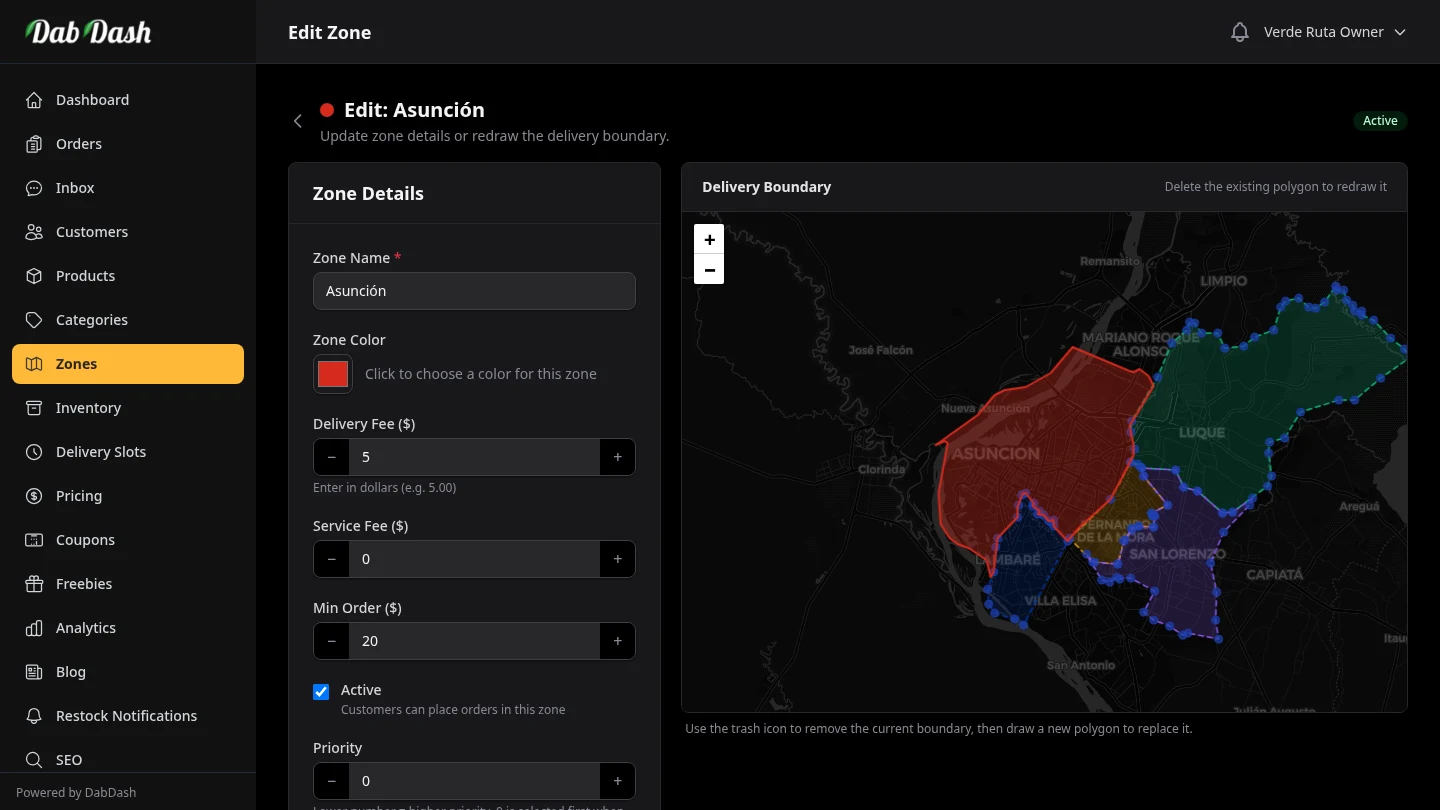
To edit an existing zone, click the Edit button in its row on the zones list. The zone editor opens with the existing boundary already drawn on the map and all fields pre-filled. A boundary status indicator confirms the boundary is loaded.
- To adjust the boundary, drag any corner point on the map to reshape it. Right-click a corner point to remove it (minimum 3 points).
- To start over completely, click the red trash button to clear the boundary, then draw a new one.
- To update only the fees or name, change the fields and click Save Zone — you do not need to touch the map.
- Toggling Active off from the edit form pauses deliveries to that area without deleting the zone.
Deleting a Zone
At the bottom of the edit form is a Delete Zone button. Deleting a zone is permanent — customers whose addresses only fall inside that zone will no longer be able to place orders. Use the Active switch instead if you want to temporarily pause deliveries to that area.
Zone Settings
- Name
- A descriptive label shown to customers at checkout (e.g., "Downtown", "North Suburbs"). Keep it short and recognisable.
- Colour
- How the boundary appears on the coverage map. Pick a distinct colour when you have multiple zones so they are easy to tell apart.
- Priority
- When a customer's address falls inside two overlapping zones, the zone with the higher priority number wins. Use priority to handle edge cases between zones with different fee structures.
- Delivery Fee
- The flat fee charged to the customer for delivery. Set to $0.00 for free delivery in that zone.
- Service Fee
- An optional additional fee (e.g., a handling or convenience charge) shown separately at checkout.
- Minimum Order
- The smallest cart subtotal required to place an order in this zone. The checkout will block the customer if their cart is below this amount.
- Active / Inactive
- Only active zones are available to customers at checkout. Deactivate a zone to temporarily stop deliveries to that area without deleting it.
Bulk Zone Actions
Select one or more zones using the checkboxes and use the floating action bar at the bottom of the screen to apply changes across all selected zones at once:
- Activate / Deactivate
- Enable or disable multiple zones simultaneously — useful when expanding or pausing a delivery area.
- Set Delivery Fee / Service Fee / Min Order
- Apply a uniform fee or minimum order to multiple zones at once. Enter the dollar amount in the field that appears after selecting that action.
- Delete
- Permanently remove selected zones. Customers in those areas will no longer be able to place orders. This action requires confirmation and cannot be undone.
Frequently Asked Questions
How do I create a delivery zone in DabDash?
Open Delivery Zones from the sidebar and click Create Zone. Draw your zone boundary on the map by clicking to place polygon points, or use Import Nearby to pull in live region boundaries. Set your delivery fee, minimum order amount, and priority, then save and activate the zone.
How do I get delivery zones set up quickly in DabDash?
Open Delivery Zones and either click Create Zone to draw a polygon manually or use Import Nearby to pull live region boundaries around your store using a 5 km, 15 km, 25 km, 50 km, or 100 km radius. Then review the map, adjust fees and minimums, and activate the areas you want to serve.
Can I check whether a customer address is inside one of my delivery zones?
Yes. The Delivery Zones page includes an address coverage checker above the map. Enter an address and DabDash geocodes it, drops a marker on the map, and shows every matching zone with its priority so you can confirm coverage before the customer checks out.
Can I search delivery zones by customer in DabDash?
Yes. The search bar on the Delivery Zones page matches both zone names and customers. Selecting a customer highlights their saved addresses on the map so you can see which areas they fall inside and adjust coverage without leaving the page.
Can I charge different delivery fees per zone in DabDash?
Yes — each zone has its own delivery fee, service fee, and minimum order amount. You can offer free delivery in a nearby zone, charge more in a farther zone, or require a higher basket minimum for long-distance deliveries.
What happens when delivery zones overlap in DabDash?
When an address falls inside multiple overlapping zones, DabDash applies the zone with the highest priority number. Set the priority when creating or editing a zone so the correct fee structure wins in overlap areas.